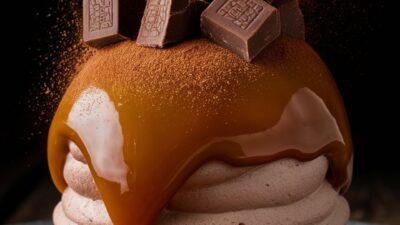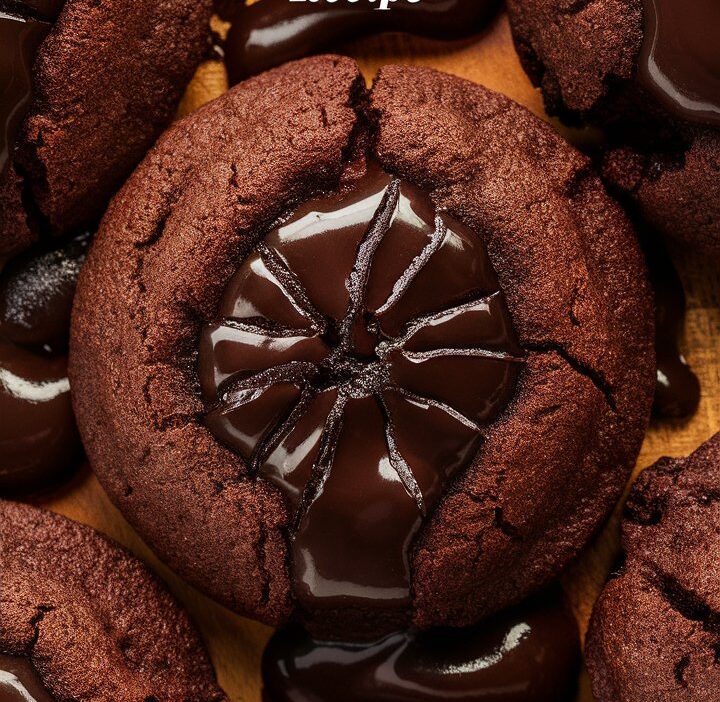
There are few desserts that can truly stop time — those moments when the aroma of melting chocolate fills the air and every bite feels like comfort, warmth, and indulgence all at once. Among all chocolate-based desserts, Chocolate Lava Brownie Cookies stand out as the ultimate delight for any sweet lover.
Imagine biting into a cookie that’s crispy at the edges yet soft, warm, and molten in the center — a combination of chewy brownie texture and gooey lava cake magic. These cookies are pure decadence, a dessert that satisfies cravings, uplifts the mood, and leaves everyone asking for seconds.
Whether you’re baking for a celebration, a cozy family evening, or simply to treat yourself after a long day, these Chocolate Lava Brownie Cookies bring together the best of both worlds — the classic comfort of brownies and the irresistible charm of lava cakes.
In this complete guide, we’ll dive deep into everything you need to know: from the perfect ingredient balance and step-by-step baking method, to expert tips, storage solutions, and fun variations that make this recipe unforgettable.
🍪 Why You’ll Love These Chocolate Lava Brownie Cookies
There are hundreds of cookie recipes out there — but this one is different. These cookies aren’t just about taste; they’re an experience. Here’s why they’ll become your new favorite:
1. A Decadent Chocolate Explosion
Every bite delivers a rush of pure chocolatey goodness. The outer layer is slightly crisp, while the center oozes with warm molten chocolate.
2. Quick and Simple
Even beginners can master this recipe. With basic pantry ingredients and easy steps, these cookies come together in under 30 minutes.
3. Perfect for Any Occasion
Whether it’s a family gathering, a romantic dinner, or a weekend treat, these cookies fit every mood and moment.
4. Crowd Pleaser
Serve them warm, and watch faces light up as that molten chocolate flows. Kids, friends, or guests — everyone falls in love instantly.
5. Customizable
From dark chocolate chunks to a hint of espresso, you can tweak the recipe to match your taste.
🧂 Ingredients for Chocolate Lava Brownie Cookies
Here’s what you’ll need to bake about 18 irresistibly gooey cookies:
- 1/2 cup (115g) unsalted butter – adds richness and softness.
- 1 cup (200g) granulated sugar – provides sweetness and crisp edges.
- 1/2 cup (100g) brown sugar – gives moisture and a caramel-like depth.
- 2 large eggs – bind the dough and create structure.
- 1 teaspoon vanilla extract – enhances the chocolate aroma.
- 1/2 cup (50g) unsweetened cocoa powder – the base of deep chocolate flavor.
- 1 cup (125g) all-purpose flour – gives body to the cookie dough.
- 1/2 teaspoon salt – balances sweetness and enhances taste.
- 1/2 teaspoon baking powder – adds lightness and prevents dense texture.
- 3/4 cup (120g) semi-sweet chocolate chips – for the molten center and extra texture.
💡 Pro Tip: Use high-quality cocoa and chocolate. The flavor of your cookies depends directly on the chocolate you choose.
👩🍳 Step-by-Step Instructions
Step 1: Preheat the Oven
Preheat your oven to 350°F (175°C) and line a baking tray with parchment paper.
Step 2: Melt the Butter and Mix the Sugars
In a small saucepan, melt the butter over low heat. Once melted, remove from heat and whisk in the granulated and brown sugars until smooth and slightly glossy.
Step 3: Add Wet Ingredients
Whisk in the eggs one at a time, followed by vanilla extract. Mix until everything is fully incorporated.
Step 4: Combine Dry Ingredients
In a separate bowl, whisk together the cocoa powder, flour, baking powder, and salt. Gradually add the dry ingredients into the wet mixture. Stir gently until just combined — overmixing can make cookies dense.
Step 5: Fold in Chocolate Chips
Gently fold in your chocolate chips using a spatula. The dough should be thick but sticky.
Step 6: Scoop and Bake
Use a tablespoon to scoop dough portions onto the baking sheet, leaving about 2 inches of space between each.
Bake for 10–12 minutes, until the edges are set but the centers are still soft.
Step 7: Cool and Serve
Let cookies cool for 5 minutes on the tray before transferring them to a wire rack. Serve warm for that perfect lava experience!
🍫 Tips & Tricks for Perfect Results
✅ Use Chilled Dough: Refrigerating your dough for 30–60 minutes helps cookies hold their shape and enhances flavor.
✅ Don’t Overbake: The magic lies in that molten center — remove them slightly underbaked.
✅ Choose Quality Chocolate: Use real chocolate chips or chopped chocolate bars instead of compound chocolate.
✅ Use Room Temperature Eggs: They mix more evenly and help the cookies rise properly.
✅ Cool Before Serving: Allow cookies to set slightly before breaking them open for a perfect gooey texture.
🍦 Serving Ideas
These cookies are incredibly versatile. Pair them with:
- Vanilla Ice Cream: The contrast of cold ice cream and warm lava is irresistible.
- Espresso or Coffee: Enhances the deep cocoa flavor.
- Fresh Berries: Strawberries or raspberries balance the sweetness.
- Whipped Cream: Adds a light, airy touch to this indulgent dessert.
💡 Try serving in mini cast-iron skillets for a restaurant-style presentation!
🧁 Make Ahead and Storage
- Make Ahead: Prepare the dough and refrigerate for up to 48 hours.
- Freeze: Roll into balls and freeze for up to 3 months. Bake directly from frozen — just add 2 extra minutes to the baking time.
- Store Baked Cookies: Keep in an airtight container at room temperature for 3–4 days.
- Reheat: Warm in the microwave for 10–15 seconds to restore the molten texture.
⚠️ Common Mistakes to Avoid
❌ Overmixing the Batter: Leads to cakey cookies.
❌ Overbaking: Destroys the lava center.
❌ Using Low-Quality Cocoa: Reduces flavor richness.
❌ Skipping the Chill Step: Can cause flat cookies.
🍪 Recipe Variations
1. Salted Caramel Lava Cookies
Add a small caramel candy inside each dough ball before baking.
2. Double Chocolate Espresso Cookies
Add 1 teaspoon of instant espresso powder to intensify the chocolate flavor.
3. Peanut Butter Lava Cookies
Spoon a bit of peanut butter in the center before baking for a nutty surprise.
4. Mint Chocolate Lava Cookies
Add ½ teaspoon of peppermint extract for a refreshing twist.
🧠 Expert Baking Insights
Professional bakers know that success lies in balance — moisture, heat, and time.
- Moisture from butter and brown sugar keeps cookies chewy.
- Heat ensures the molten core sets just right.
- Timing determines whether you have lava or just fudge.
For the perfect result, always test-bake one cookie first to gauge your oven’s behavior.
🍽️ Nutritional Information (Per Cookie – Approx.)
- Calories: 150
- Fat: 7g
- Carbohydrates: 19g
- Sugar: 12g
- Protein: 2g
- Cholesterol: 20mg
- Fiber: 1g
❓ FAQs
Q1: Can I make this recipe without eggs?
Yes! Substitute each egg with ¼ cup of unsweetened applesauce or 3 tablespoons of yogurt for a vegetarian-friendly version.
Q2: How do I ensure my cookies stay gooey in the center?
Underbake them slightly and use good-quality chocolate chips that melt properly.
Q3: Can I make this recipe gluten-free?
Yes — replace all-purpose flour with a 1:1 gluten-free flour blend.
Q4: Why did my cookies turn out dry?
They may have baked too long or used low-fat butter substitutes. Always stick to full-fat butter.
Q5: What’s the best way to store leftover dough?
Wrap in plastic wrap or airtight containers and refrigerate or freeze as mentioned above.
🏁 Conclusion
Chocolate Lava Brownie Cookies are a dream come true for every dessert enthusiast. They’re simple enough for beginners yet elegant enough to impress guests. The balance between crispy edges and molten chocolate hearts makes them one of the most indulgent cookie creations ever.
With proper ingredients, the right temperature, and a few expert tricks, you can recreate this bakery-quality dessert right in your home kitchen. So preheat that oven, grab your mixing bowl, and prepare to make magic — one gooey, fudgy bite at a time.